Tuesday 23 September 2014

First Day of Fall!! / Butternut Squash & Apple Soup

Ahhh! Late September...One of My Favourite Seasons (I'd say Summer and Fall are tied for 1st!) Love everything about Autumn - makes me very happy.

We tend to get the best weather in September and October...bright sunny blue skies and crisp mornings and evenings. A great time for soup....
Butternut Squash/ Apple Soup 
I usually tend to roast my squash in the oven for an hour before I use it in my soup... gives it a lovely deep earthy flavour. But for this soup, I wanted it to be lighter with a tiny kiss of sweetness from Ontario's delicious apple harvest. 

1 butternut squash, seeds removed and diced into chunks
2 apples, peeled and diced (I used Idareds from the Leslieville Farmer's Mkt)
2 tbl olive oil
1 medium onion, diced
splash of white wine for deglazing
1 can of coconut milk
spice mixture: 11/2 tsp coriander seeds, 1 1/2tsp cumin - toasted and then crushed in a pestle and morter
5 cups of chicken stock
s and p
Method: In a dutch oven, heat olive oil over med high heat and add diced onions. Soften for 3 mins or until translucent. Add the spice mixture to the onions and saute for a minute or so until spices are aromatic and onions are browning. Deglaze the pan with a splash of white wine and scrape any browned bits from the pans surface. Add the squash and apple. Stir for a minute to combine and then add the coconut milk. After another miute, add the chicken stock, bring to soft boil, cover and lower heat to simmer for 45 mins. Use a hand blender to blend the soup and then season with salt and pepper.
 ENJOY!!


 Save a wee bit of the spice mixture to sprinkle on the top of the soup to serve. :)
 
I like to use the lower fat version of the coconut milk which can often be super high in fat/calories.

 
Bon Appetit! and Happy Fall!


Wednesday 5 March 2014

Friday Night Thai/ Pad Thai and Green Chicken Curry

I was craving Thai food big time. I have made Pad Thai in the past, but some of the recipes I have used have been very labour intensive. My plan was to find a not-too-intense recipe to follow to make Pad Thai and then create my own Green Chicken Curry.
I ended up finding an easy to follow recipe on Joanna Goddard's Blog A Cup of Jo LOVE HER BLOG BTW!!!! The recipe actually originally came from another great blog called Cook Smarts.

Friday morning, I took a trip to my local Asian food mart Fu Yao Supermarket. Fu Yao has a huge selection of foods from a variety of different cultures. If you are looking to cook something ethnic and fabulous (like these recipes!!)
, try hitting an Asian store like Fu Yao for spices, curry pastes, sauces, and fresh produce ingredients like lemon grass, fresh thai basil and  green thai chillies. Very cool.

Plentiful fresh produce at Fu Yao.

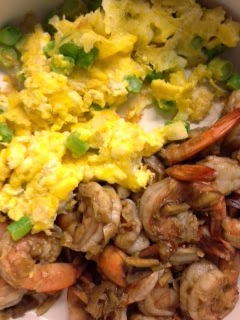
Shrimp Pad Thai and Green Chicken Curry


Recipe for Great Shrimp Pad Thai (adapted from Cook Smart)....
8 ounces of Pad Thai rice noodles
3 tbl vegetable oil
1 tbl sesame oil
1 lb of shrimp deveined, tail on ( for flavour)
1 bunch of green onions, chopped
3 cloves of garlic, chrushed
3 eggs, whisked
1/2 cup chicken stock
2 tbl. brown sugar
2 tbl fish sauce
2 tbl soya sauce
2 tbl tamarind paste
1 lime
1 bunch of  fresh cilantro
s and p

Method:
1. In a large bowl completely cover the noodles with boiling hot water for 6-8 minutes until soft and chewy. Drain and then toss with a little sesame oil so that they don't go clumpy.
2. Mix together the chicken stock, fish sauce, soya sauce, tamarind paste, sugar and garlic.
3. Add a couple of tablespoons of this marinade to the shrimp and let sit for a few minutes.
4. Over medium high heat, add 1 tsp of the vegetable oil and saute shrimp for a minute until just cooked. Set aside.
5. Return wok to medium-high heat and add the white parts of the chopped green onions and the whisked egg, scramble lightly for about 30 seconds. Add the rice noodles and the remaining sauce. Toss for a few minutes until completely coated and the noodles absorb the sauce.
6. Now add the shrimp, green parts of the chopped onion, chopped cilantro and a squeeze of lime juice.
7. Toss and taste...if it needs anything, add a dash or two of the above ingredients until it is spectacular and amazing!!! So so good!!!

Green Chicken Curry (recipe by Me)
4 boneless skinless chicken breasts
2 yellow peppers, sliced thinly
1 large onion, diced
1 bunch of cilantro
2 tbl of green curry paste
1 can of coconut milk
1 cup chicken stock
1 lime
s and p
1 tbl cumin
2tbl canola oil


Method:
1. Slice chicken into bite size pieces and marinate for 15 mins. in a bowl with some of the chopped cilantro, cumin, s and p, and lime juice.
2. In a smaller dutch oven, heat 1 tbl of the oil on medium-high heat and add the sliced onions and sliced peppers. Saute for a few minutes until softened and then set aside.
3. In the same pan, heat another tbl of oil and brown the chicken for a minute or two on all sides.
4. Add the onions, and peppers, green curry paste, coconut milk and chicken stock. Bring to a boil and then turn heat to simmer. Cover and cook for 20 mins. Delish!!!!

Give it a shot!! Happy March Break!!


Been Dealing w/ Computer Issues!!!

My laptop has been sick....very very sick. I blame my son's Minecraft game...BUT, I digress... I am over it...the bugs have been fixed, viruses dealt with and ALL IS WELL.

March Break is next week and we are heading north to Haliburton.
I plan to cook my way through the week and I am so looking forward to doing so and just hanging with my family...my teens are less than thrilled, but they'll have fun!!!

Watch for my post later today on last Friday's Thai Night!!!!
I'll be back with lots of great recipe ideas....

Winter is ALMOST over!!!


Tuesday 18 February 2014

Family Day Weekend : Mini Blueberry Pies in Mini Mason Jars

We spent Family Day Weekend in Haliburton. 
It was sunny and cold and so winter beautiful. Lots of snow!
I spent my weekend with my family...cross country skiing, tobogganing, knitting and cooking...total bliss!


On Sunday night we had a big family dinner and I decided to replicate a recipe that I had seen on Pinterest. Mini Blueberry Pies in Mini Mason Jars!!! So cute!
The recipe that I used called for not cooking the berries and just tossing them with some citrus zest, cinnamon, flour, topping with a little butter, and then covering with puff pastry. The little pies did not turn out as well as I had anticipated, they were good, but not amazing...so I changed things up and came up with this much better recipe!!!

Recipe for Mini Mason Jar Blueberry Pies
12 Mason Jars 125ml
2 bags of frozen wild blueberries ( approx. 5 cups )
zest of 1 lemon
3/4 cup of brown sugar
1/2 tsp cinnamon
water
3 tablespoons of cornstarch
2 tablespoons of butter
Frozen Puff Pastry
melted butter and brown sugar sprinkles for topping
Method:
 1. Combine 1/2 the blueberries with the brown sugar in a pot.
2. Simmer on low heat for a few mins. until sugar is melted.
3. Add the cornstarch mixed with a little water and add it to the pot. Cook for a few minutes on medium heat.
4. Fold in remaining berries,lemon zest, cinnamon and butter, and let cool for a few minutes.
5. Lay out the mini jars onto a cookie sheet.
 6. Carefully pour the blueberry filling into the jars.
7. Follow the instructions on the frozen puff pastry box and then roll out the puff pastry on a floured surface until it's an 1/8 of an inch thick.
 8.Cut out circles that are a wee bit larger than the rim of the jars.
9. Place a pastry lid on each jar, press down to lightly seal the edges, poke steam holes and baste with a little butter and a sprinkling of brown sugar.
10. Bake in a 375 degree oven for 35-40 mins. until bubbly and golden brown.

Here are some pics from the first batch that I made on Sunday.....

Tip: Make sure you fill the jars up to the top. While they are baking, the pastry will puff up and will then settle back down...my first batch could've used a little more filling. :)
Serve with some vanilla ice cream, or a dollop of whipped cream.
Enjoy!


Wednesday 5 February 2014

Warmest Winter Veggie and Herb Soup

Happy February....It's snowing!!! AGAIN!!!
Today is a good day, for going to the fridge and pulling out all those veggies that I bought at the beginning of the week with the best of intentions ("Gonna eat so GREEN this week!!"....ya, well not as much as I  had planned !!!)....
 My veggie drawer was pretty full... spinach, zucchini, leeks, carrots, celery...Time to make soup.

This recipe is my own. It's basically a use whatever you have on hand in your fridge, add an assortment of herbs, simmer blend and serve. Quick. Easy. Yummy.


Recipe for Veggie Soup w/ Herbs

This is what I had on hand, so I used....
2 zucchini, diced
2 carrots, diced
1 large leek, diced
2 stalks of celery, diced
1 med onion, diced
1 medium potato, diced
1 big bunch of spinach, julienned
2 tbl spoons of olive oil


Saute the leeks, onion, celery and carrots in the the olive oil for 5 mins.

Then, add whatever herbs you'd like...For this soup, I used dried herbs, and I added 1 tsp each of the following;
Marjoram, Dill, Summer Savoury, Tarragon, Thyme and then seasoned with S and P.

Add the zucchini and potato, saute for a few minutes to blend the herbs.


Finally, add the spinach and 6-8 cups of chicken stock. Bring to a boil, then cover and simmer for 30 mins.

Once the veggies are softened and the soup is smelling good, use a hand blender (Love my GREEN Cuisinart Smart Stick!!) to blend your veggies into a creamy (sans cream!...the potato gives it its fullness), delicious, healthy, herbed winter soup. 

And voila! This soup is so perfect to have after an hour spent shoveling the driveway! I love this soup because it's really healthy and it tastes great. Hope you LOVE it too. 
If you don't have homemade stock on hand (not many of us do!), be sure to use a great flavour base like BETTER THAN BOULLION for your stock. It's got NO MSG and is super handy. I keep a jar of  beef  base and chicken base in the fridge at all times.
 

How many more weeks of winter????

Saturday 25 January 2014

Chef Love-In #2 : Ina Garten -The Barefoot Contessa / Apple Crisp

I'm a BIG fan of Ina Garten. Best selling cookbook author, and star of the Food Network's The Barefoot Contessa. Ina lives a pretty spectacular life in East Hampton, New York with her husband Jeffrey. She once owned a specialty food shop in the Hamptons and then moved on to books and her own tv show.  What I like most about her books/show is that she shares her stylish recipe ideas with great energy and a sense of fun. Her passion for food and for creating special meals for family and friends shines through. Her recipes are foolproof, unique and delicious and I adore her!!! I have 5 of her 8 books...my sister has the other 3!!! :) Check out the Barefoot Contessa here.


The Barefoot Contessa's Apple Crisp (adapted)

This apple crisp is SPECTACULAR!! When I made it, my husband said...'keep this in your regular repertoire!!!'...You will LOVE this!!! It is one of the best I have ever had...and that is saying a LOT!!!


5 lbs of Macintosh apples
Grated zest of 1 lemon and 1 orange
2 tablespoons freshly squeezed orange juice
2 tablespoons freshly squeezed lemon juice
1/2 cup granulated sugar
2 teaspoons ground cinnamon

For the crisp topping:
1 1/2 cups all-purpose flour
3/4 cup granulated sugar
3/4 cup light brown sugar, packed
1/2 teaspoon kosher salt
1 cup oatmeal
1/2 pound cold unsalted butter, diced 
Preheat the oven to 350 degrees. Generously butter a 9 x 14 x 2-inch baking dish. Peel,and cut the apples into large wedges. Combine the apples with the zests, juices, sugar, and cinnamon. Pour into the dish.
To make the topping, combine the flour, sugars, salt, oatmeal, and cold butter in the bowl of a stand mixer fitted with the paddle attachment. Mix on low speed until the mixture is crumbly and the butter is the size of peas (this can also be done by hand, but it's a little more work). Scatter evenly over the apples.
Place the crisp on a sheet pan and bake for one hour until the top is brown and the apples are bubbly. Serve warm. 
Wedges of apples waiting to be topped with the crisp mixture...
The topping...Sugar and butter...is there anything better???
After an hour in the oven, bubbling and brown and SO SO Good!!!
Happy Weekend! Make some apple crisp!!! You'll be VERY happy you did!
As Ina would say... "How easy was that?"....

Tuesday 21 January 2014

A Birthday Dinner - Part 2 Carrot Cake w/ Cream Cheese Icing.

The Best Carrot Cake....adapted from Canadian Living

Bake one today, for someone you love....

Cream Cheese Icing - Adapted from Canadian Living

8oz cream cheese
1/4 cup of softened butter
2 tsp of vanilla
1- 1/2 cups of icing sugar
squeeze of lemon juice
Whip this together in the stand mixer or beat by hand until light and creamy. Frost once cake has cooled and sprinkle with chopped walnuts.


Happiest of Birthdays Mr. McComb!....xo